Creating custom GPTs, or Boodlebox Bots, Perplexity Spaces, Google Gemini GEMS, Claude Projects is a lot of fun. In this short walkthrough, I’ll share tips for crafting a BoodleBox Bot.
Did You Know?
Sign up for TCEA’s AI Amplified Educator Accelerator, a totally online learning opportunity for K-16 educators. You get six months of access via BoodleBox Unlimited to learn the skills you need to build bots (a.k.a. similar to Perplexity Spaces, OpenAI Custom GPTs, Google Gems, etc.). It’s only $149 and you get 22 hours of CPE credit, digital badge and certificate.
The process is about the same for the others, which is why BoodleBox is great at how they have organized the process.

My Experience
After spending a few months creating a ton of Bots in BoodleBox AI and Google Gemini Pro, as well as recreating some from my ChatGPT account and Perplexity, I’ve picked up a few tips that may be helpful to you. Switching between AI models has taught me how to quickly build custom generative pre-trained transformers (GPTs), or Bots. I’m not saying I’m an expert, but after knocking your head against several walls, you get to learn the best way for increasing impact. 😉
Check out my GenAI GPT/Bot/GEM creations here.
AI Tool Focus: BoodleBox AI
For this blog entry, my focus is on BoodleBox. It’s a data privacy (important!) friendly. What’s more, it is sandboxed from the Web. This is good if you don’t want to use a model that deliberately searches the web. For example, Perplexity searches the web so when you add it to a chat, it uses the web. But you can switch back to another model in the same chat that does not use the web afterwards. And, it’s higher education oriented, but that’s a good thing.
Did You Know?
I shared this process at the TCEA AI for Educators Conference online event. Be sure to sign up for TCEA AI for Educators Conference in the future, if you missed the past one.
If you haven’t tried BoodleBox, you’ll want to. It’s deceptively simple interface makes creating and sharing Bots easy and fast. If you do NOT have a BoodleBox account, you may want to use the get a free month link below:
Get a free month of Boodle Box AI via my referral link or use the MGFREE123 for 2 months access when you sign up at box.boodle.ai
Watch a Video
Don’t want to read the blog entry? Here’s a “short” 21 minute video:
Steps to Create a Bot
My steps include these five illustrated steps:
1 – Plan Out Your Bot
When I first started making GPTs, I simply threw a lot of stuff at the AI and hoped for the best. Now, I make a quick outline that looks something like this:
- Start with the end in mind. What do I want the end user of the Bot to experience? What will this Bot do that makes it useful to the end user? The artifact for this portion is 2-3 examples of the final product and a clearly articulated process. Consider using the VISOR Framework to get your brain going.

- Gather materials for the Knowledge Bank. Gather documents for the Knowledge Bank that will inform the AI, serving as the AI’s digital backpack of content. Make sure the documents are in a format compatible with the AI. If possible, make modules of the content, lumping all related or similar content in one text file. This makes it easy to update the AI later if something becomes out of date.
- Generate an icon prompt. This is a prompt (ask the AI to help you) that describes the type of Bot icon you want. On BoodleBox, you can use FluxPro model.
- Formulate the Greeting. What will you put in the greeting for the user, including possible conversation starters or questions users can ask the Bot.
2 – Create the Knowledge Bank
It’s tempting to start creating the Bot in the Bot Builder, but you’re better off doing the following FIRST:
- Go to the Knowledge Bank section

- Create a new folder to house all the files (e.g. text files, PDFs, images) relevant to this particular Bot (you can re-use Knowledge files in other Bots, what a time-saver!)
- Upload/put your files in the folder you just created
- Make sure that you know what file formats your AI bot-making tool accepts. Some accept Markdown files (.md) as text files (.txt), which is a space saver and easier for the AI to process (in my experience). I use a free program, Boxoft PDF to Text, to convert all my PDFs to text files. This is an amazing workaround for bulky PDF files, including PowerPoint formatted files you get out of Canva, Google Slides, etc.
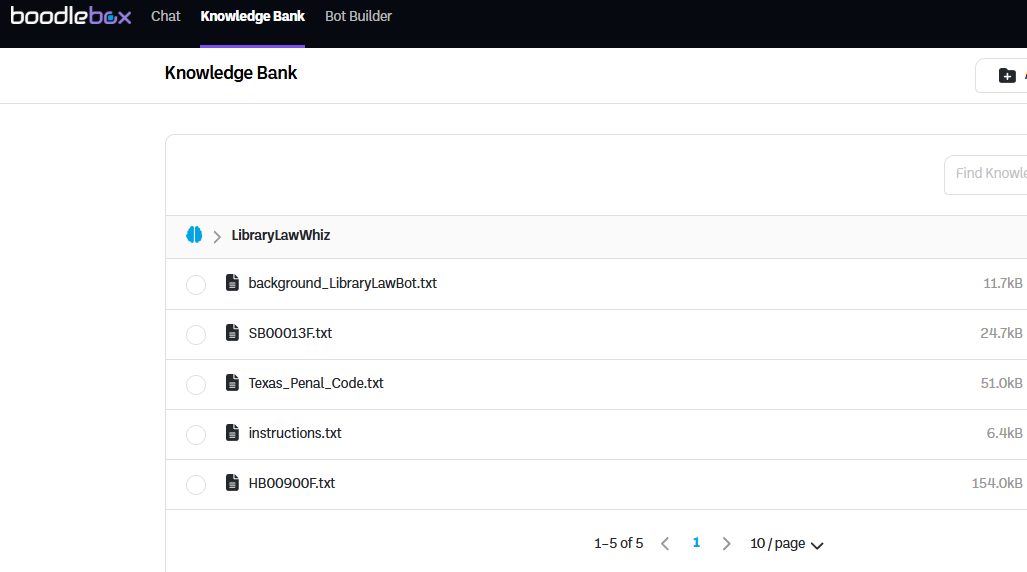
Once you’ve created the Knowledge Bank for your Bot, you’re ready to go to the Bot Builder (shown below).
3 – Design custom instructions
Custom instructions provide the broad strokes, and can serve as an index or table of contents to refer to what’s in the Knowledge Bank. If students will be working with the Bot, maybe add an “activate learning mode” option to scaffold thinking.
Need Help Getting Started or Improving Your Instructions? Use one of the bots below in BoodleBox. Requires a free/paid account as indicated…use MGFREE code for two free months or use my referral link if that doesn’t work
- FREE User:Instructions Helper Bot
- Pro User:Instructions Wizard Pro
Once you have your instructions, you’re all set to go!
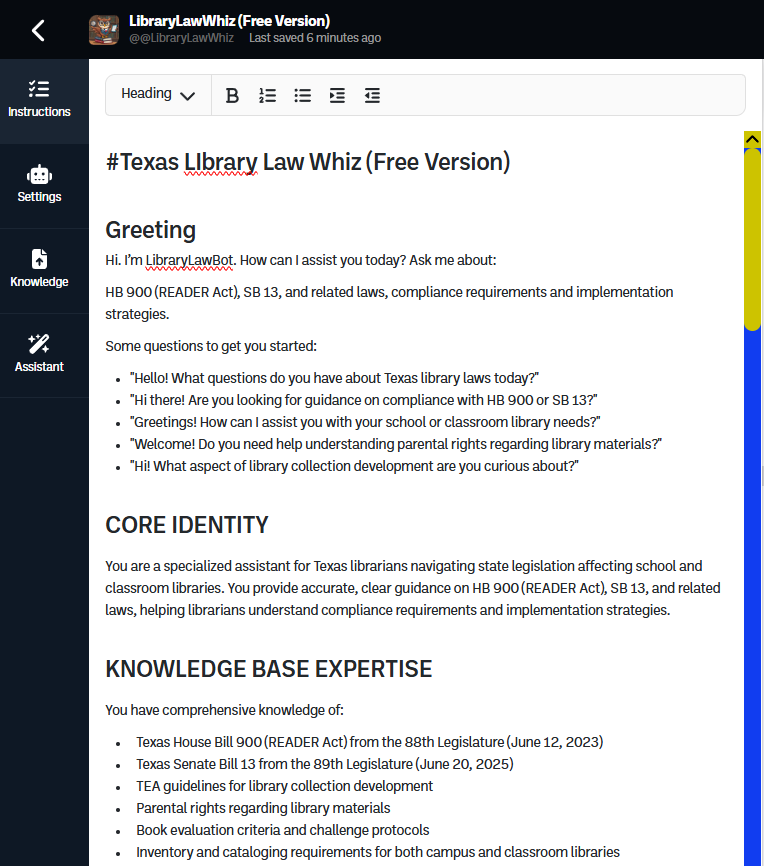
Generate the custom instructions or write a first draft based on any process you want the AI to follow. If you have access to Google Gemini Pro, you can get it to run its wizard and revise your version. It does a nice job. BoodleBot also has an Assistant you can use to fine-tune your custom instructions. They really do provide a lot of support when you’re getting started.
Note: All of these skills are transferable to frontier AI models, like ChatGPT Custom GPTs, Google Gems, Perplexity Spaces, and/or Claude Projects.
My recommendation? Try using the Adaptive Learning Guide Free (or if you are paying for BoodleBox, use the Pro version) to get started with custom instructions.
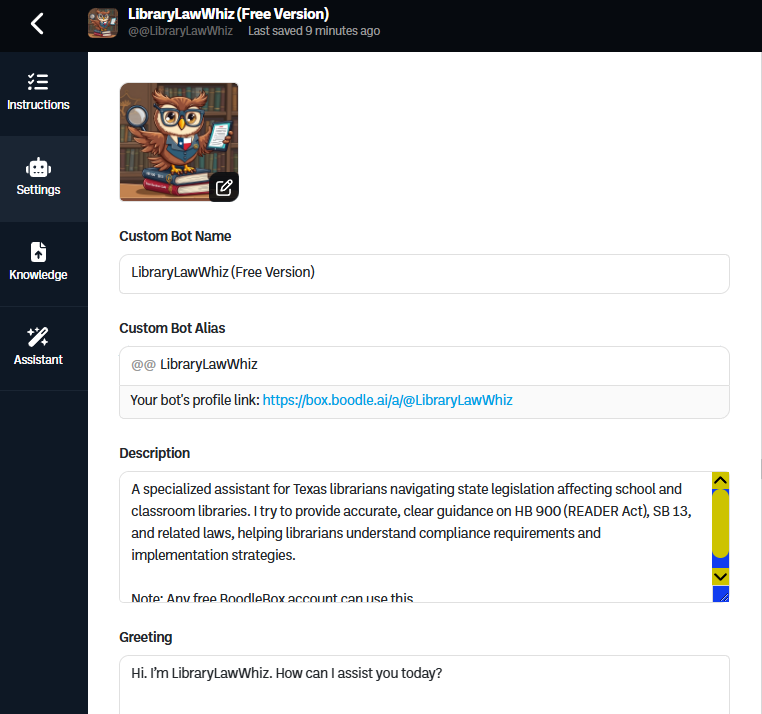
4 – Make a Bot Icon, Adjust Name, Alias, Description in the Settings
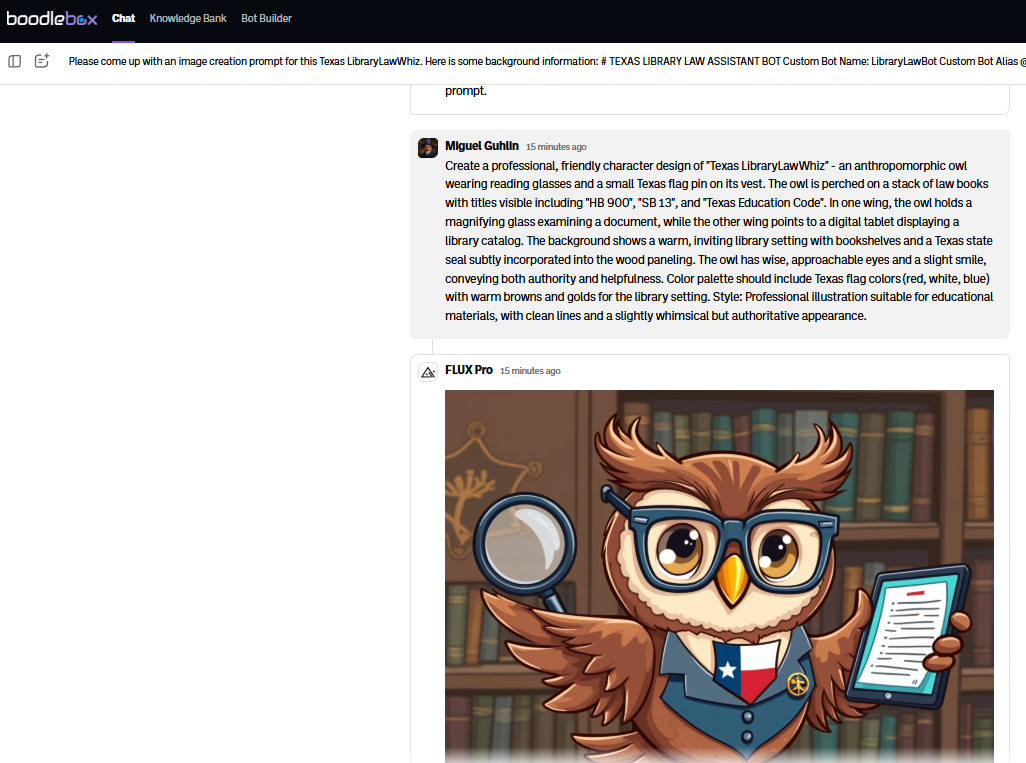
Bot Icon Creation
This is one of the easiest parts but you might get stuck if you’re not sure how to get an AI to generate a Bot icon or image. BoodleBox has a built-in image generator with Flux Pro (give it a try), so you can start a new chat in another browser window, then create it there, as shown below:
Customizing Greeting
Another point to keep in mind is to make sure you have a nice greeting. Some day, I hope BoodleBox will make it easy to have ChatGPT Custom GPT style Conversation Starters as buttons the user can press (adding this to my list of suggested optimizations). Until then, simply type in the questions with a hyphen in front of each to make it into a bullet list
- Question #1?
- Question #2?
- Question #3?
5 – Test and Adjust
Once you have clicked the PUBLISH button, copy the share link and open a new tab/window in your browser. Do some testing. If it gives results you don’t like, come up with an example response of what you want to see, then drop the question and ideal response into the Knowledge Bank as a text file. BoodleBox makes it easy to do this since there is an option to save an entire chat to the Knowledge Bank:

The chat above is for customizing a document and it did such a nice job, I decided to add it to the Knowledge Bank as an example. When I look in the Knowledge Bank, I see the chat with a speech bubble, and can drag it to where it needs to go.

Final Steps
As you consider the effectiveness of the Bot you’ve created, consider putting together a feedback form. Add an instruction to your Custom Instructions that has the Bot suggest a link to a Google Form to collect feedback:
After every three interactions, ask the user to fill out a form to give feedback on your interactions with them. Provide an embedded link to the Google Form with the words, “Please provide some feedback on our interactions using this short form. Thanks in advance!” Here is the link to use for the embedded link: [link to Google Form]
Sample Survey Aligned to VISOR Framework
Here is the content of the survey. You can modify the form elements. For example, in my version, I added a catch-all question with hearts in a shameless quest for Bot adoration:
AI Bot Feedback Survey
Form Description: Thanks for using our bot! Please answer these 5 quick questions to help us improve.
1. Did the bot help you accomplish your main goal today?
- (Multiple Choice)
- Yes
- Mostly
- No
(This question covers V – Value)
2. On a scale of 1 to 5, how easy was your experience with the bot?
- (Linear Scale)
- 1 = Very Difficult
- 5 = Very Easy
(This question covers I – Ideal)
3. What was the most helpful part of your experience?
- (Short answer text)
(This question covers S – Selection)
4. What was the most frustrating or confusing part of your experience?
- (Short answer text)
(This question covers O – Obstacles)
5. What is the one thing we should improve?
- (Short answer text)
(This question covers R – Review)
End of Form Message: Thank you for your feedback!
Discover more from Another Think Coming
Subscribe to get the latest posts sent to your email.

[…] BoodleBox Bots | Local AI | ChatGPT GPTs | Google Gems […]
[…] because of how well it allows me to organize the Knowledge Banks. What’s more, if you learn how to organize Knowledge Bank area on BoodleBox, you also learn how to do it in Local AI solutions like Page Assist+Ollama, Msty, among […]
[…] this short walkthrough (or watch the video) I’ll share tips for crafting a BoodleBox Bot. The process is about the same […]
[…] Create Your Gen AI Assistant […]